

How's it going readers? If you've been paying attention and/or have the basic ability to count, you'll notice that this is the third post in a series about using Excel's secret Weapon of Math Destruction: PowerPivot. I highly suggest that if you haven't read the previous two posts, you go ahead and do that. If you had, you would already have:
- Have enabled Powerpivot through the COM add-ins.
- Know what Powerpivot is.
- Understand why PowerPivot can make your life as an analyst a great deal easier.
- Be ready to power up some ginormous flat files.
I'm going to assume that you, as an incredibly stylish and intelligent reader of my posts, have completed these four tasks...now let's put it to the test.
Before we begin, you need to put yourself into the Powerpivot mindset, and really devote center your focus to the Powerpivot. What I mean by this is that despite Powerpivot being a very efficient way to tackle large files, it's still a major job for your PC, so I'd recommend closing any unnecessary programs before you start...especially Chrome, ain't nobody got RAM for that.
To begin, open up a blank Excel worksheet, then click that brand new Powerpivot header up top. You'll then be greeted by a shiny new set of options, but for our purposes, we're going to be focused on only one of them: "Manage".
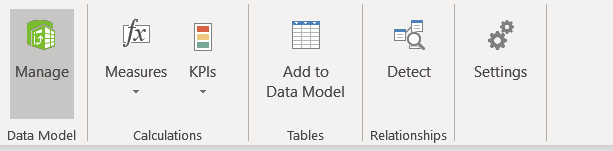
Go ahead, give it a nice double click (why is this a double click when everything else is a single click? I have absolutely no idea). This will open up the main Powerpivot interface, and it's where you'll be doing most of your work.

To get rocking, you first need to put some data into what they call the "data model" which for our intents and purposes is sort of like a "super spreadsheet" (I know DBAs, don't @ me). As we've discussed using Powerpivot mainly to process gigantic flat files, we'll walk through that, but know that Powerpivot can grab data from a whole host of places, including databases, cloud services, and more.
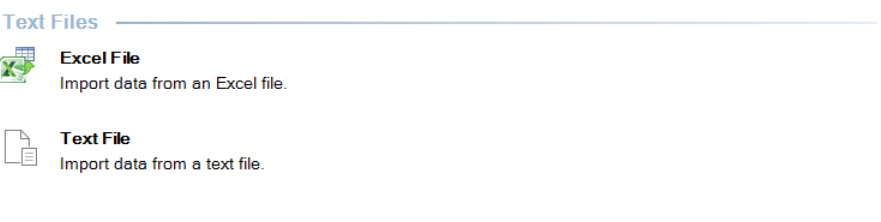
Start by clicking "from other sources" at the top, you'll be greeted with a new dialog box where you can select from all sorts of fancy datatypes (including regular Excel spreadsheets!) but we want to focus specifically on text flat files, which you'll find at the very bottom, give it a nice click, and hit next.
This will bring up a window that should be familiar to those of you who read my previous post. In this window, you're telling Powerpivot what character your file is delimited by. As a quick refresher, the delimiter is the punctuation that separates cells within a text file. As a good rule of thumb, I choose the delimiter before browsing for the file, but the truth is, it makes very little difference.
After choosing your delimiter, click browse and go find your text file, I shouldn't need to explain this to you, this isn't amateur hour. After double-clicking your file, you'll see a weird, off-color version of part of the spreadsheet in the window...this is where the fun starts.
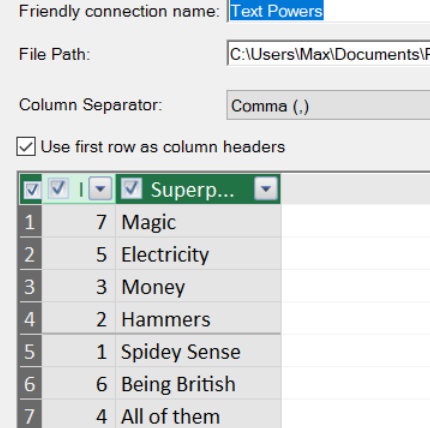
From here, before you go any further, you can utilize those checkboxes at the top of each column to choose not to include any columns of the source file in your finished project. This is way handier than you might think at first look as if you've got a file with 50 columns, but you only really need 5 of them, you don't need to waste the extra time and brainpower porting in the whole thing.
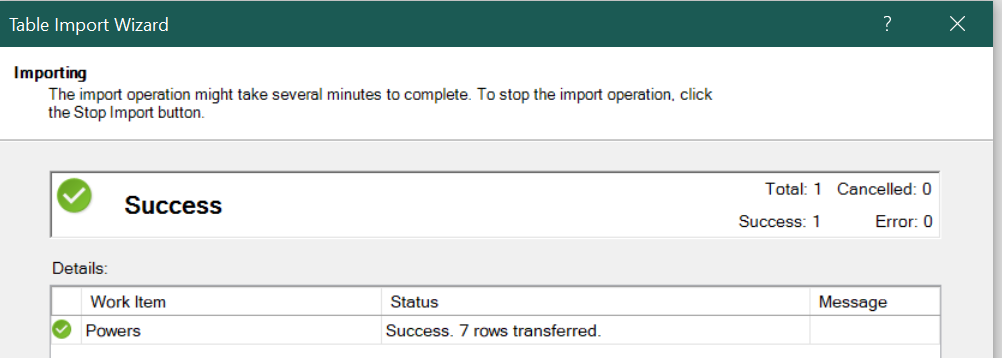
Once you've made peace with your chosen columns, hit finish, this will bring up the import window. As a quick side note, how quickly your computer imports the file is HEAVILY dependent on your processing power, RAM, and drive speed, however, a good rule of thumb is that a 2-gigabyte file (yes, gigabyte...the kind you can't open in regular Excel) shouldn't take more than 10 minutes on a "standard" work laptop (8 GB ram with a lowish clocked 4 core processor and an SSD), granted, you can see the rows being imported in real-time, so that's a pretty good gauge to see if your file crashed. After that's done, hit close
This brings you to the Powerpivot interface, the first thing you'll notice is that it looks strikingly similar to Excel...and that's because it is. From here, you can interact with the imported file in a similar way to a normal worksheet, but there's also a whole bunch of fancy stuff you can do in addition (to fanciness pending future posts). However, let's focus on the most basic of activities that you come to Powerpivot for creating a pivot table.
Once your file has been imported, simply click the pivot table button in the main interface, and boom: looks exactly the same as if you were doing it in basic Excel, with one interesting wrinkle: in the pivot table fields dialog box, there will be a little carrot next to the name of the file that you imported, and after clicking the file, it'll show you all of the fields that you can pull in from the data that you imported!

While being able to pivot off of files of nearly infinite size is cool enough as it is, things start to get really funky when you've imported more than one file into the data model (just follow the steps from the beginning with a different file). After hitting the pivot table button again, you'll see BOTH tables available for pivoting.

Now, I know what you're thinking: can you pull data from both tables at once!? Well...you'll just have to wait till next time when we start to get fancy.
Happy Pivoting,
-Snacks