

Well, hello again dear reader, it's been a while. I've been hard at work moving around and summarizing ever-expanding datasets using nothing but the wonderful tools offered to me in the Microsoft office suite (and occasionally using the SAS Enterprise guide for a very unintended purpose, but that's for a later post...and hopefully, a never post). I know I promised a post about hardware, and maybe I'll include something about that in my next post. However, there are much more pertinent and useful things at foot, and the truth is, you're probably working on a laptop anyways.
Those of you who have read my previous work has probably figured out that my mantra is "use only what you need," as such, while I knew of the existence of this wonderful tool, I hadn't had a use for it, and thus a desire to share it with you all until very recently. You also know that while I like talking tech, and I'd like to say I'm good at what I do, my background isn't in computer science (or any of the related disciplines). Unlike Todd and Matt on this here website, I'd struggle to code anything from whole cloth, I'm a dyed-in-the-wool script kiddie if there ever was one.
However, my background also gives me a very particular set of skills: I'm not going to assume that you know about fancy python packages, and I understand that there's a good chance that my first post about the macros and VBA might have scared you (and I'm happy you didn't leave!). I also won't bog you down with the nitty-gritty of how anything works (because I probably don't know), or even if the way I'm showing you is the best way to do things (because I probably don't care) I realize that there's an opportunity cost to learning a more efficient method that is generally far outweighed by the actual work you have to do.
Still reading, Good. This post, and quite possibly the subsequent sub-series (I don't want to over-promise here) will assume that you've read my previous Excel-related posts, so that means that you're going to need to know how to:
- Purchase and Install Excel 2013 or later (or persuade your company that being on anything older than that is certifiably mental)
- Understand how to mess with your options in Excel.
- Understand how to write basic formulae, especially IF statements, and Index(Matches) in Excel.
- Most importantly, have a really good understanding of pivot tables.
Still here? Good, let's take the green pill, crush it up, mix it with some water, toss it on a spoon, heat it up, and mainline it...so you can see how deep this rabbit hole goes.
It turns out that starting with Excel 2013, Microsoft started really shifting its business priorities from operating systems and the office suite to its cloud-based platform (which is now called Azure). During this switch, they focused on bringing significantly more powerful versions of their office software into the space, services that allow you to leverage much larger datasets that come from hosting your data on the cloud, and play well with other services that your company might be using (like Tableau, AWS, etc). This turbocharged version of Office is referred to as the "Microsoft Business Intelligence (BI) Stack".
It turns out that there are some actual geniuses working at Microsoft (who knew?) who realized that not everyone is always going to be connected to the cloud, and there's some use in having a desktop version of the more powerful cloud versions of the software. Wait! You say, isn't a desktop version of the cloud version of Office just Office? Well...Yes, and no. What they did was bury this super powerful version of Excel (called PowerPivot) within a slurry of options, and I'm gonna show you how to access it.
First, make sure you're using Excel 2013 or later. Then, mouse over to File, Options, Then add-ins (you can download PowerPivot for Excel 2010, but nobody's got time for that).
From here, you'll see a dropdown at the bottom of the screen. Click this dropdown and select "COM add-ins", like so:
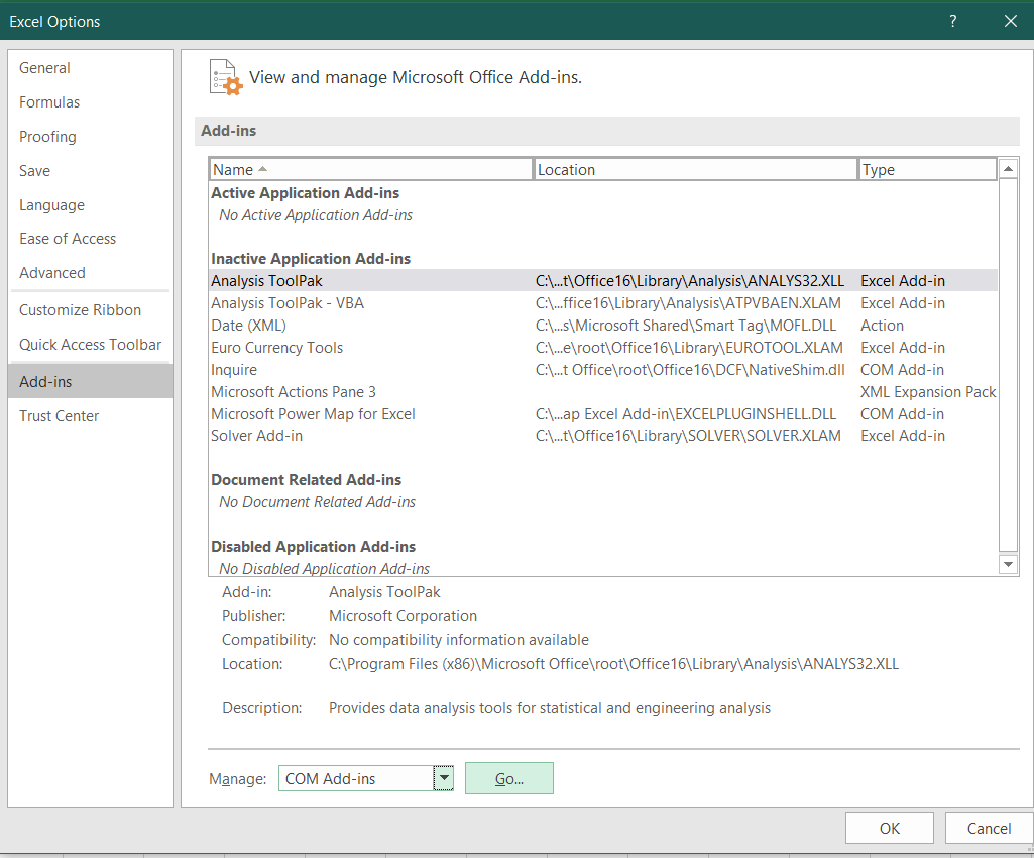
From there, you'll see a handful of add-ins, click "Microsoft PowerPivot for Excel" and you're ready to go.
After clicking OK, you'll see the new option to select "PowerPivot" at the top of your screen:

So, now that you've added Powerpivot to your Excel toolkit, you might be asking...why?
The answer for the average analyst among you is "it lets you open giant files in order to create pivot tables", but the real answer is "it lets you open a bunch of giant files at once, create relationships between them, and then pivot THAT out".
And next time, we'll talk about exactly that.