
Now that you know your way around API Gateway, you have the power to create vast collections of endpoints. If only we could get those endpoints to actually receive and return some stuff.
We'll create a GET function which will solve the common task of retrieving data from a database. The sequence will look something like:
- Connect to the database
- Execute the relevant SQL query
- Map values returned by the query to a key/value dictionary
- Return a response body containing the prepared response
To get started, create a project on your local machine (this is necessary as we'll need to upload a library to import). We're ultimately going to have 3 items:
- rds_config.py: Credentials for your RDS database
- lambda_function.py: The main logic of your function, via the 'handler'
- pymysql: A lightweight Python library to run SQL queries
Storing Credentials Like an Idiot
For the sake of this tutorial and to avoid a security best-practices tangent, I'm going to do something very bad: store credentials in plain text. Don't ever do this: there are much better ways to handle secrets like these, such as using AWS Secrets Manager.
# rds_config.py

db_username = 'myUser'
db_password = 'jigheu896vf7bd'
db_name = 'myDatabase'The Holy lambda_function.py
This is where the magic happens. For this GET call, we're simply going to get all records from a table in a database and return them in a consumable way for whomever will ultimately use the API.
Remember that Lambda expects you to specify the function upon initialization. This can be set in the "Handler" field here:

handler is the function.Let's build this thing:
import sys
import logging
import rds_config
import pymysql

# rds settings
rds_host  = "myDatabase.ghfghghgf.us-east-1.rds.amazonaws.com"
name = rds_config.db_username
password = rds_config.db_password
db_name = rds_config.db_name

# logging
logger = logging.getLogger()
logger.setLevel(logging.INFO)

# connect using creds from rds_config.py
try:
    conn = pymysql.connect(rds_host, user=name, passwd=password, db=db_name, connect_timeout=5)
except:
    logger.error("ERROR: Unexpected error: Could not connect to MySql instance.")
    sys.exit()

logger.info("SUCCESS: Connection to RDS mysql instance succeeded")

# array to store values to be returned
records = []

# executes upon API event
def handler(event, context):
   with conn.cursor() as cur:
   cur.execute("select * from employees")
   conn.commit()
   for row in cur:
            record = {
                    'employee_id': row[1],
                    'employee_info': {
                        'firstname': row[2],
                        'lastname': row[3],
                        'email': row[4],
                    }
                }
            records.append(record)
return recordsCheck out what's happening in our handler function. We're:
- Establishing a DB connection
- Running a select all query for a table in our database
- Iterating over each row returned by the query
- Mapping values to a dict
- Appending each generated dict to an array
- Returning the array as our response body
PyMySQL
The shitty thing about the AWS console is there's no way to install python libraries via the UI, so we need to do this locally. In your project folder, install PyMySQL by using something like venv:
$ venv lambdaenv
$ . lambdaenv/bin/activate
$ pip3 install pymysql
That will install the pymysql library in your environment bin. Copy that into your main directory where lambda_function.py lives.
Game time
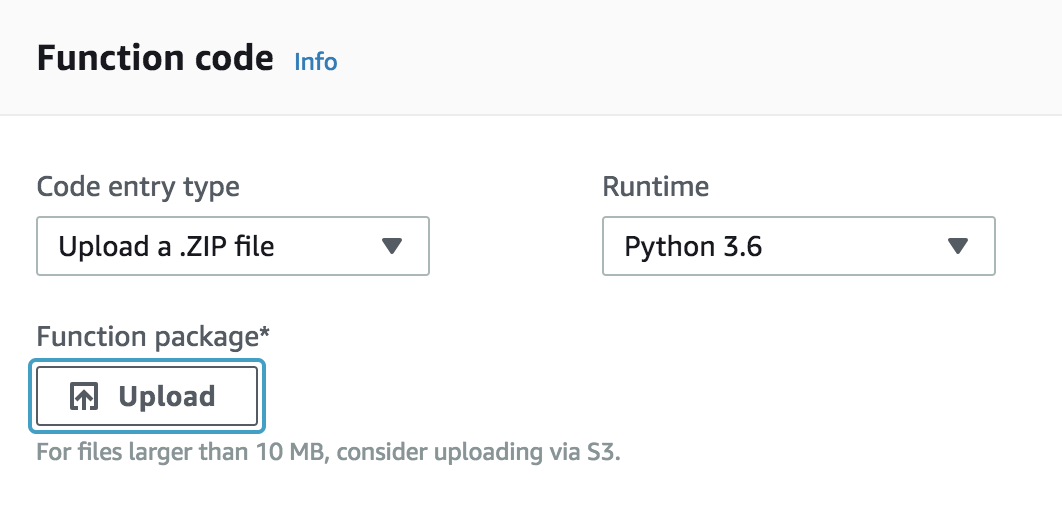
In your project folder, make a zip file of lambda_function.py, rds_config.py, and PyMySQL. Upload your ZIP file via the "Code entry type" field:
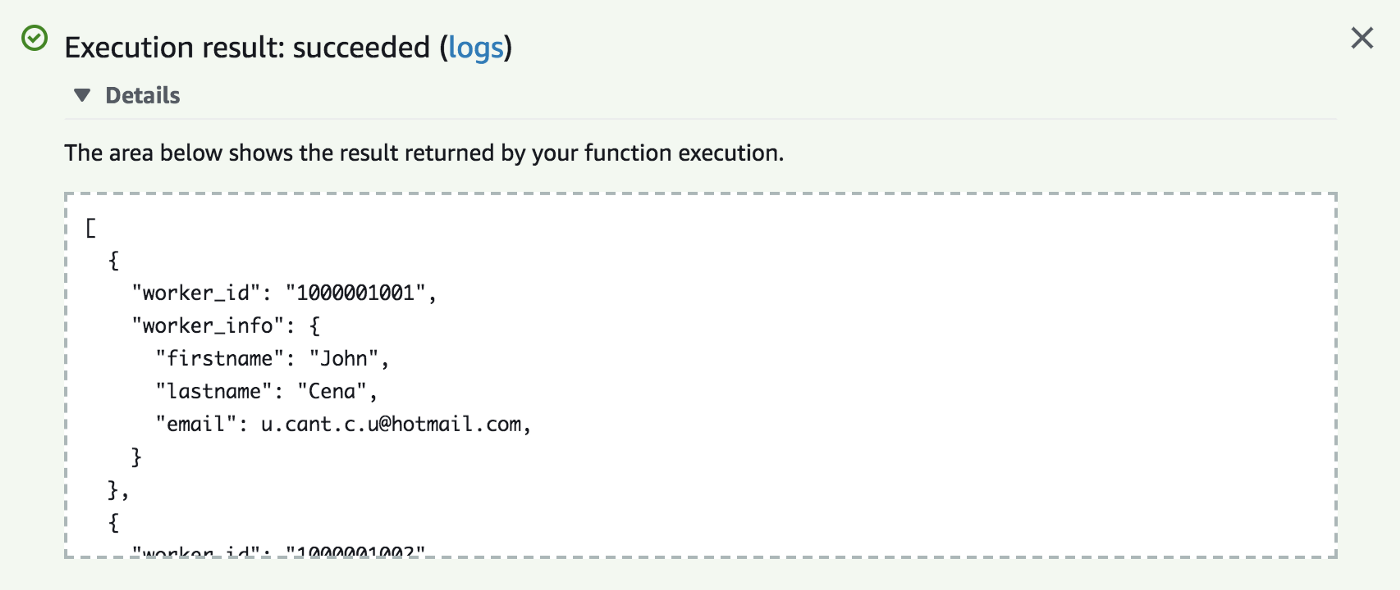
Save your function and run a test via the top right menu. When asked to specify a test type, select a standard API call. Your results should look like this:
Post Functions
Creating a POST function isn't much more complicated. Obviously we're essentially doing the reverse of before: we're expecting information to be passed, which we'll add to a database.
lambda_function.py
import sys
import logging
import rds_config
import pymysql
import json

# rds settings
rds_host  = "myDatabase.ghfghghgf.us-east-1.rds.amazonaws.com"
name = rds_config.db_username
password = rds_config.db_password
db_name = rds_config.db_name

# logging
logger = logging.getLogger()
logger.setLevel(logging.INFO)

try:
    conn = pymysql.connect(rds_host, user=name, passwd=password, db=db_name, connect_timeout=5)
except:
    logger.error("ERROR: Unexpected error: Could not connect to MySql instance.")
    sys.exit()

logger.info("SUCCESS: Connection to RDS mysql instance succeeded")

def handler(event, context):
    data = {
        json.dumps({
        'key': event['id'],
        'email': event['email'],
        'firstname': event['firstname'],
        'lastname': event['lastname'],
    }
    with conn.cursor() as cur:
        sql = "INSERT INTO `workers` (`key`, `email`, `firstname`, `lastname`) VALUES (%s, %s, %s, %s)"
        cur.execute(sql, (data['key'], data['email'], data['firstname'], data['lastname']))
        conn.commit()

    return {
        'statusCode': 200,
        'body': data,
        })
}Parameters in a post function are contained in the event parameter we pass tot he handler. We first create a dict to associate these values. Pay attention to how we structured our sql query for best PyMySQL best practice.
Post functions expect a response body to contain (at the very least) a status code as well as a body. We'll stick to bare minimums here and tell the user is good to go, and recap what was added.
For the sake of this demo we kept things simple with an insert query, but keep in mind this means the same record can never be added twice or updated in this manner- you might be better suited by something such as REPLACE. Just something to keep in mind as you're building your app.