
Friends, family, and most importantly, strangers: I approach you today with a tale of renewed inspiration. After loudly broadcasting my own confusion and mediocre ability to actually implement an effective cloud via MongoDB Stitch, my ineptitude has been answered with an early Christmas gift.
My incessant complaining gained some acknowledgement from a couple of folks over at MongoDB. Perhaps the timing is simply by chance, but since then I've begun noticing something some subtleties in the Stitch documentation; namely that if you look hard enough, some of it begins to make sense. Either way, I'm chalking this one up as a Christmas Miracle.
Let's Automate Stuff: More Webhooks, Less Labor
To demonstrate what building an end-to-end sexy feature looks like in MongoDB Stitch, I'm going to borrow some help from some old friends: the team behind Clarifai.
Clarifai is one of the early players in the field of what I'm sure we'll creatively refer to as AI as a service. More specifically, they provide an API for image recognition which returns impressive metadata simply by passing an image URL. Best part is, unless you're abusing the shit out of 5000 requests per month, the API is essentially free:
| Predict | Search | Custom Model Training | Add or Edit Input Images |
|---|---|---|---|
| 5,000 free operations | 5,000 free operations | 5,000 free operations | 5,000 free operations |
|
Pre-Built Models: $1.20 / 1,000 operations Custom Models: $3.20 / 1,000 operations |
$1.20 / 1,000 operations | $1.20 / 1,000 operations | $1.20 / 1,000 operations |
If we were to try to fit any more instances of the words "AI" and "Cloud" into this post, things could quickly derail into a shitty IBM Watson commercial.
(PS: Blockchain.)
Storing Our Clarifai API Key
If you're following along, hit up Clarifai to grab your API key, no strings attached.
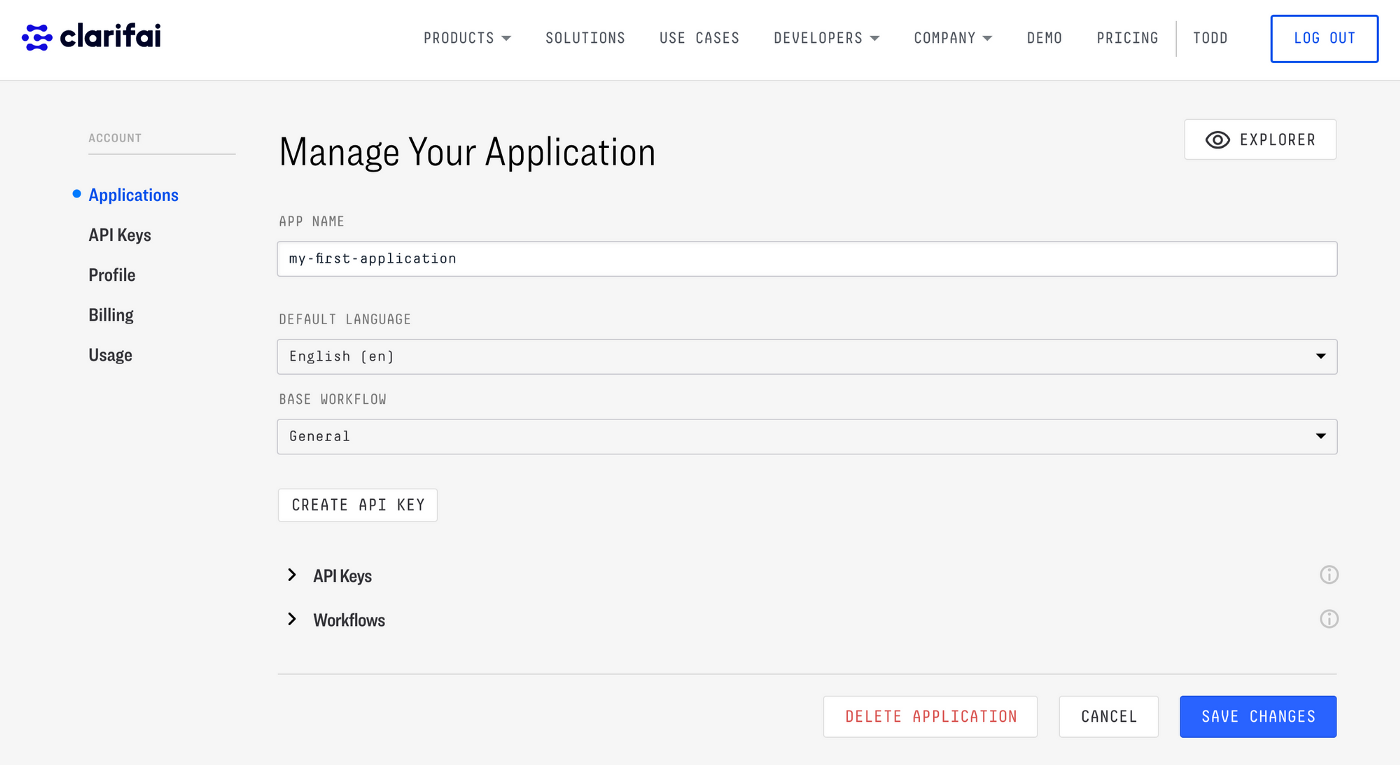
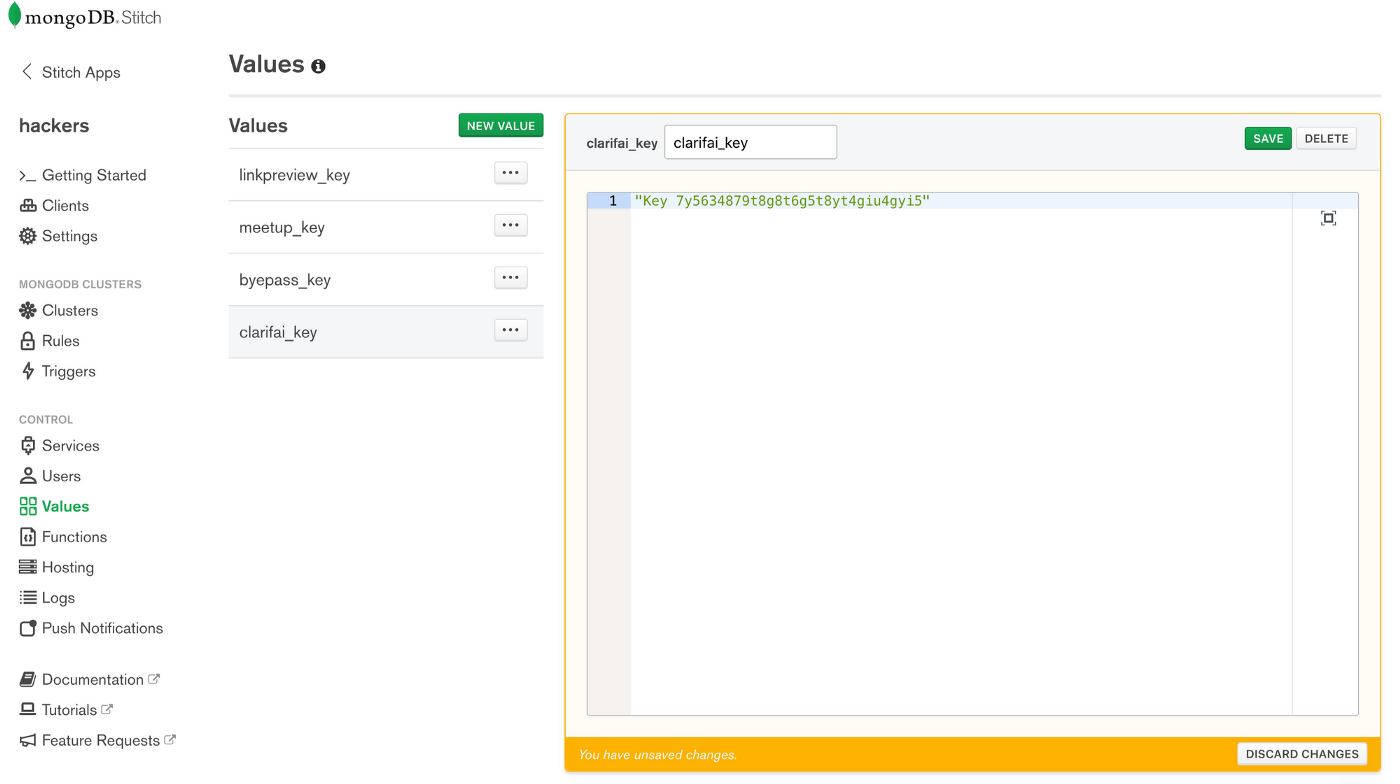
Copy and paste your brand new key and head over to the MongoDB Stitch Console. In our Stitch project, we're going to store our key as a value (you might recall this as being a convenient way to store secrets).
Copy and paste your key as a string in a new value. The only catch is we'll be formatting our key as Key #####################, simply because this is the format the API expects to receive when we pass our key as a header to the Clarifai API.
Warning: Mild Architecting Ahead
Before going too far into code, let's recap how this functionality will probably work.
In our actual application, we'll be identifying images needing alt tags (either via frontend or backend logic). At that point, we should find the src attribute of said <img> tags and pass it to a Stitch function; preferably one that makes a post request to Clarifai.
This is in fact too simple to be true, as there is one gotcha: Stitch functions cannot make http requests on their own. They can, however, invoke Stitch Webhooks. These webhooks share nearly identical syntax and structure to functions, with a few exceptions:
- Webhooks have endpoints (duh).
- They have explicit inbound/outbound rules restricting what can invoke them.
- There are options to set authorization via key or otherwise.
With all that in mind, our end-to-end flow will end up looking something like this:
- Our application identifies an image needing tags an invokes a serverless function.
- The function constructs the body of the request we'll be making to Clarifai with containing the URL of the image.
- As crazy as it sounds, we then POST to a Stitch endpoint, which in turns makes the actual POST request to Clarifai. The request is made with the body passed from our function, as well as the API key we stored earlier.
- We'll receive a response of tags which we can do something with on the application-side.
Writing our Function
We'll start by writing a simple function as our go-between for our app and our service:
exports = function(img){
   const http = context.services.get("GetClarifaiTags");
   var data = {
        "inputs": [
          {
            "data": {
              "image": {
                "url": img
              }
            }
          }
        ]
      };

    var header_data = {"Content-Type": [ "application/json" ]};

    return http.post({
        url: "https://webhooks.mongodb-stitch.com/api/client/v2.0/app/hackers-uangn/service/GetClarifaiTags/incoming_webhook/GetTagsForNewImage",
        headers: header_data,
        body: JSON.stringify(data)
      })
      .then(response => {
      // The response body is encoded as raw BSON.Binary. Parse it to JSON.
      const ejson_body = EJSON.parse(response.body.text());
      return ejson_body;
    });
};The first thing we do is reference our webhook (which we haven't created yet) with this line:
const http = context.services.get("GetClarifaiTags");In the context of a function, context.services.get() allows us to reference and interact with other services we've created in Stitch. It's important to note that we pass the user-created name of service we want to interact with. This is one of the reasons why Stitch's documentation is so confusing - they consistently use "http" as an example service name. This seems to imply that we'd want to import a type of service as opposed to an instance of a service, which is wrong.
data is the body of our request, which abides by Clarifai's documentation on how to user their predict API. We need to pass this as a string to our webhook, thus we use JSON.stringify(data).
It's also important to note the structure of Mongo's headers when making requests; notice that the value of each key pair is a list, as exemplified by "Content-Type": [ "application/json" ].
As you might imagine, these things in combination can cause a whole lot of confusion. Hopefully you know a good blog to point these things out to you beforehand.
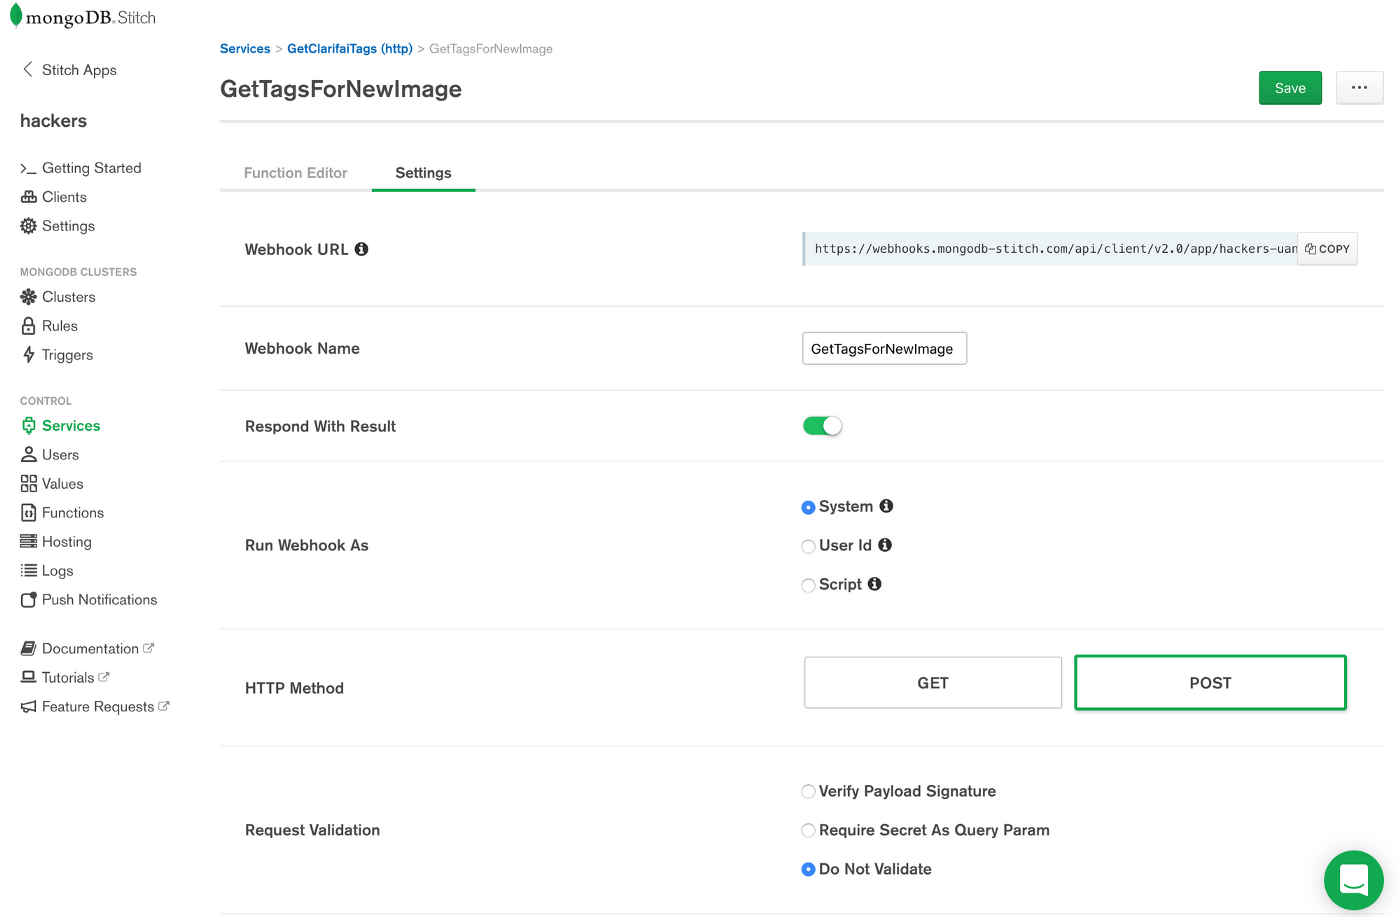
Create a Webhook via 'HTTP Services'
Move into the "Services" tab to create our webhook. Select HTTP from the list of options:

Set your webhook to be a POST request. Authentication shouldn't be a problem for us since we're only exposing this hook to our function, plus there are other ways to handle this.
The syntax and methods available for writing a webhook are almost exactly the same as when writing regular functions. The one thing to note would be the presence of payload being passed into the function; this object contains both the parameters and the body of requests being received by this endpoint. payload.body gives us the body, whereas payload.query.arg will give us the parameters.
exports = function(payload){
  const http = context.services.get("GetClarifaiTags");
  const token = context.values.get("clarifai_key");

  var data = {};
  if (payload.body) {
    data = payload.body;
  }
  var header_data = {
    "Authorization": [token],
    "Content-Type": ["application/json"]
  };

    return http.post({
        url: "https://api.clarifai.com/v2/models/aaa03c23b3724a16a56b629203edc62c/versions/aa7f35c01e0642fda5cf400f543e7c40/outputs",
        body: data,
        headers: header_data
      })
      .then(response => {
      // The response body is encoded as raw BSON.Binary. Parse it to JSON.
      const ejson_body = EJSON.parse(response.body.text());
      return ejson_body;
    });
};Just as we can access services within functions, we can similarly access values via context.values.get("myValue").
Now that we have both the body and our API key ready, we can actually go ahead and construct a valid request to Clarifai. The syntax should be self-explanatory, but here's the Stitch http service documentation just in case.
Why Did we Have to Make a Weird Webhook which is both Receiving and Posting Information?
This is an excellent question and served to be a huge source of confusion for what must have been months. Go back to the "Services" tab, and pay close attention: for each service we create, a set of Rules are automatically created and attached to our service. HTTP services have all functionality disabled room default, with little to no mention of the existence of rules in the first place. This is important for two reasons:
- It's a silly UI hiccup that can waste the majority of your waking life.
- This means that only services can do things like post to external APIs. This is why we didn't simply keep our logic in one function.
Our Workflow in Practice
Assuming you've added some logic to your app to pick out image URLs needing tags, our chain of events should be complete and return results to our application. The POST request we make will return a response to the POST request of our function, and our function will return the results to our application. We've successfully created a complex, albeit confusing, cloud architecture or external services.
This is where your imagination should hopefully kick in. You'll notice I have a few services such as the endpoints which receive updates every time a JIRA issue is created or updated.